how to make recycled paper
I've recently been bitten by the paper recycling bug. My symptoms? Ogling over multi-colored paper scraps and a strong desire to never buy construction paper ever again.
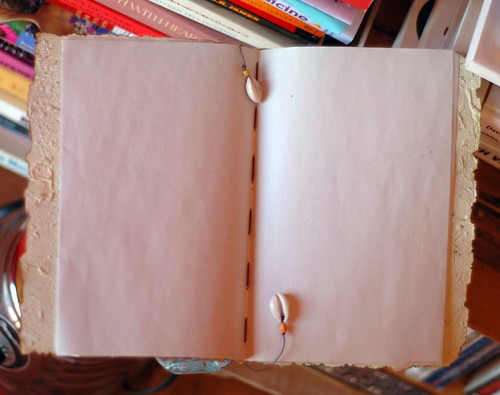
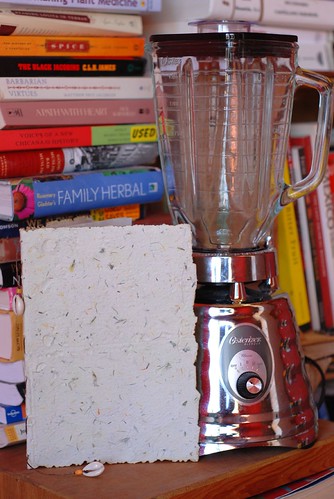
Some of the mothers in my school make beautiful things with recycled paper, such as this journal which is hand-bound with string coated in beeswax. The edges of the cover are delicately burned for a real artisan touch. (You can find beeswax here, which you apply to a single strand of hemp string, working it in with the heat of your fingers. Bind the book by sewing the layers together with a large-eyed needle, then thread some beads on each end.)

The process of making recycled paper varies from one source to the next, which can only mean one thing - the process is the kind that is open to experimentation and variation. I encourage you to do just that. Children will love experimenting with different kinds of paper and procedures. This little tutorial illustrates what has worked for me thus far.
What you will need:
-Keep a bucket of water handy next to your recycling bins. Shred by hand any used paper (a perfect job for a toddler!) and throw it into the bucket to sit for at least a day.
-An old blender
-Used frames (minus the glass and backing) of various sizes. The size of the frame will determine the size of your finished sheet of paper.
-Very, very fine plastic screening which will be stretched over the frames and used as a sieve
-Thumb tacks for attaching the screening to the frames to make the sieve
-A tupperware bin large enough to so that you can easily submerge the frames in it
-Newspaper cut slightly larger than the dimensions of your frames for blotting
-Absorbent sponge
-Rolling pin
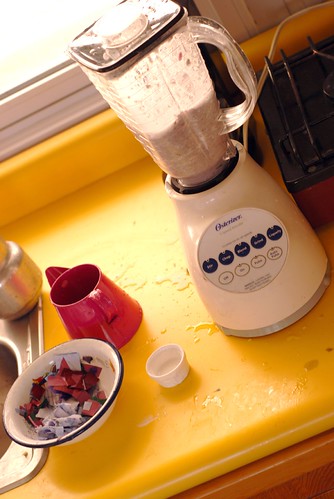
1.) With a ratio of about 1 portion of well-soaked paper scraps to 2 cups water, blend into a pulp in your old, trusty blender. Blend in short spurts so as not to burn out the motor. You will need about two half-blender-fulls (shown above) of pulp per tupperware bin batch. *If you would like to make your paper scented, add 6-10 drops of essential oils during the blending of the pulp.
2.) Fill the tupperware bin with several inches of water and pour in the pulp. Swish the mixture around so that the pulp is evenly distributed in the water. *You can add dried flowers, leaves, etc. at this point in the process, or you can wait until you have lifted the sieve out of the water and press them neatly onto the paper.
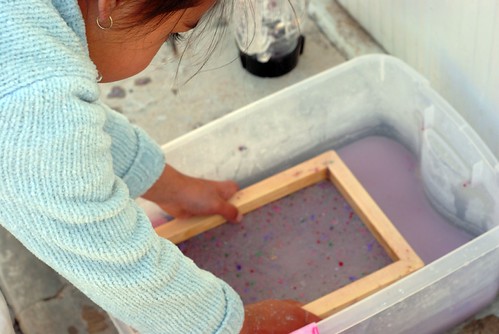
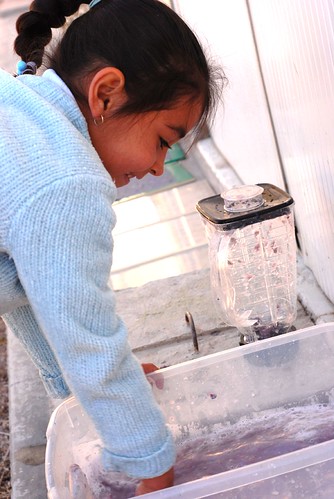
3.) Submerge the frame-sieve into the bin and slowly lift out. Place a piece of blotting newspaper on top of the pulp/paper. Using a sponge on top of the newspaper, blot away all of the excess water. Flip over the sieve and carefully remove the paper. It should still be attached to the newspaper on one side.
4.) Place another piece of newspaper on top of the paper. The paper sheet is now sandwiched between two layers of newspaper. Roll out any excess water using a rolling pin. Remove the top piece of newspaper and let the paper dry completely in a sunny spot. Carefully peel the recycled sheet from the newspaper.
Here's a video that demonstrates a slightly different way to go about it. Figure out what process works best for you. Before you know it, you'll be planning to write down all of your recipes on recycled paper, too!


20 comments:
Thanks for sharing that. I have the screens already to go, but have never gotten around to making any. That journal was wonderful.
Great tutorial! I have a bucket of recycling paper soaking in my laundry right now. Coincidence! I haven't made any for years and am looking forward to seeing how this batch turns out. I will post about it on my blog when it's done.
I really enjoy reading your blog...your photographs are lovely.
Great project for Earth Day celebrations--thanks, Meg! We did this once a couple of years ago and scored some free rose petals and leaves from a florist (we made pot pourri with the rest). 'Can't wait to try the journal!
Lovely tutorial!
When doing this with preschoolers, I've stretched panty hose over opened-up wire hangers in place of screens and frames. Panty hose in plastic embroidery hoops will give round sheets of paper.
I just did this with my children a few weeks ago! It was alot of fun. We even put some snips of fabric in one and it came out very nicely.
What an AMAZING tutorial! i absolutely loved it! We will have to give it a try this summer, and add it to our activity schedule! :)
I have some big news over at my blog as well, so if you have a moment, pop on over and take a peek. HUGS!
Kristin
http://homegrownrose.typepad.com/reclaimingthehome
I used to do this a lot at art college but haven't managed to do it with my children yet - maybe this year? It's great fun but i am always too impatient to wait for it to dry!
this has been on my to do list for so long now, thanks for sharing your directions. peace
Thanks for your tutorial. I always thought making paper would be great fun, but it seemed too complicated. This actually seems like something I could do with my three girls!
this is wonderful meg! i will keep this recipe for when my daughter is old enough. i too love the looks or recycled paper. it has a wonderful look to it. thanks for sharing!
thank you for all your tips...I just eat it up!!!!! keep them coming please
I have been planning to try this for a long time. I have the supplies needed already. I think its time to stop being afraid of the mess and just try it. Thanks for sharing.
Very nice tutorial - thanks!
Thank you for these wonderful instructions and the homemade journal inspiration. I have another project to add to my list!!
wow! thanks for sharing this! never would have thought of making it on my own, but will definitely have to try!!
hi - just stumbled on your blog and am feverishly reading your tutorial - you have no idea that I've been DYING to do this!!!
Thanks!!!!!
Sara
:0)
Great blog about Montessori. I´m from San Jose, Costa Rica and I would like to make you an interview for an education magazine. e.mail: mexcrmx@gmail.com
Best Regards,
Mauricio
Thanks for your tutorial. I always thought making paper would be great fun, but its seemed to be complicated.
Really enjoyed that I shall give it a go!
Post a Comment