recycled bath mat tutorial

I extend the warmest of welcomes to everyone participating in Sew, Mama, Sew's beyond brilliant November Handmade Holidays series! With no further ado, I present to you:
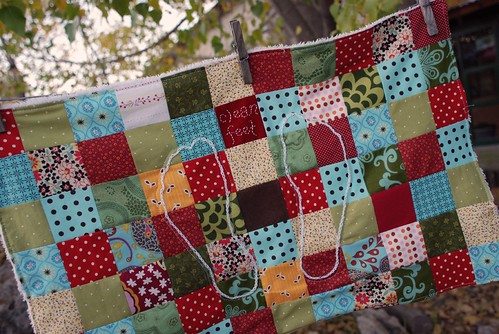
The Recycled Bath Mat Tutorial
For those looking to add a little color to their family's shower experience
For those looking to add a little color to their family's shower experience
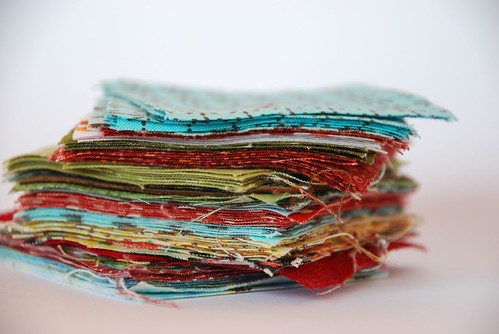
1. Dive into your scrap bag.
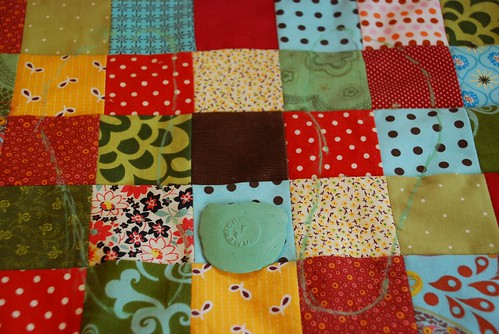
Using a card stock 2 1/2 inch square template and tailor's chalk or other water-soluble quilter's pen, trace around your template onto your scrap fabric. Cut out the square. Repeat this 87 times (you will need 88 squares, total.) Be sure to cut out a variety of complimentary fabrics. While making my mat, I stuck with reds, aquas, greens and yellows.
2. Arrange your patches
First thing's first - clean your floor and ban all fabric-loving felines from entering. You'll need to spread out your patches, 11 across by 8 down, and you wouldn't want your work disturbed once you've found the perfect layout! Once you're satisfied, begin stacking, in order, the top row of 11 patches. Leave the other rows in their place on the floor, and take this "first row stack" over to your sewing machine.
3. Sew together the patchwork strips.
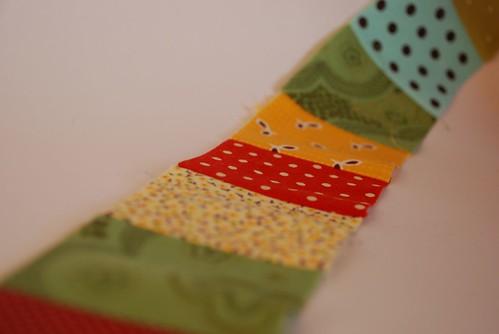
Using a 1/4 in seam allowance, sew the 11 squares together. Press the seams to one side. Return this first strip to your floor layout. Now stack the second row, sew the strip, press, and return. Repeat for the remaining strips.
4. Sew the strips together
4. Sew the strips together
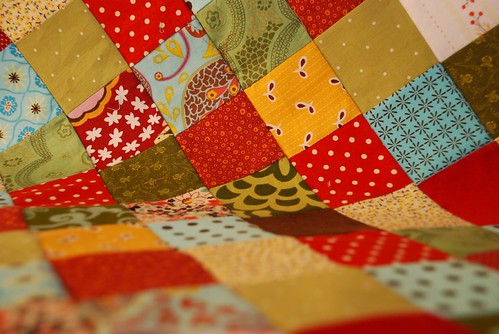
Starting with the top two strips, place the first strip with the right side facing up, then lay the second strip on top of it with its right side facing down. Secure the right, long edge with pins. With a 1/4 in seam allowance, stitch down this long edge and press the seam to one side. Repeat this process with the rest of the strips, always placing the "loose" strip face down on top of the previous strip and sewing along the right, unfinished edge.
5. Embellish the top of the mat
While it is fine to leave the top of the mat embroidery-free, I couldn't help but break out the old-fashioned needle and thread. Here's how I managed the feet outline:
5. Embellish the top of the mat
While it is fine to leave the top of the mat embroidery-free, I couldn't help but break out the old-fashioned needle and thread. Here's how I managed the feet outline:
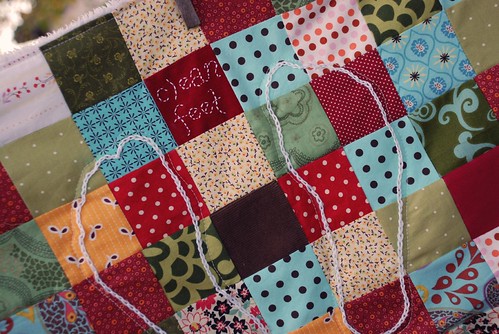
I used my own tiny feet as the model, but it would be great to use a child's footsies, or, better yet, the whole family's! Make sure the top of the mat is pressed flat, then trace around the feet using tailor's chalk.
I used the chain stitch with 6 strands of white embroidery floss because I wanted the outline to stand out from the background colors. With three strands of floss, I embroidered "clean feet" using a no-nonsense running stitch.
I used the chain stitch with 6 strands of white embroidery floss because I wanted the outline to stand out from the background colors. With three strands of floss, I embroidered "clean feet" using a no-nonsense running stitch.
6. Cut out an old terry towel for the mat backing
Cut out part of an old towel to the same dimensions as your mat front.
Cut out part of an old towel to the same dimensions as your mat front.
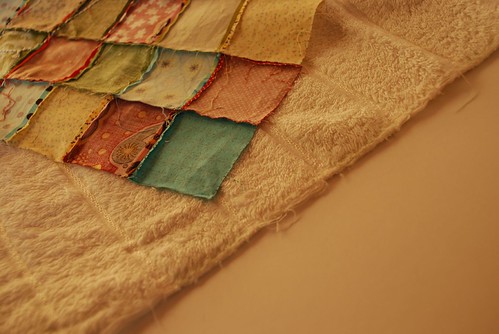
Pin the mat front, right side facing down, to the towel backing.
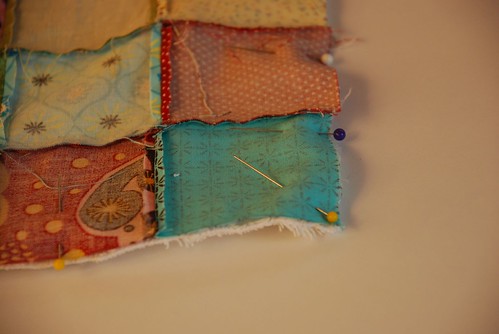
7. Sew the mat front to the towel backing
Using a 1/4 seam allowance, sew around the edges, leaving a 4 inch gap for turning. Turn the mat right side out and press. Topstitch along the entire edge, closing the "turning gap" as you go.
8. "Quilt" around your embroidery
Using a 1/4 seam allowance, sew around the edges, leaving a 4 inch gap for turning. Turn the mat right side out and press. Topstitch along the entire edge, closing the "turning gap" as you go.
8. "Quilt" around your embroidery
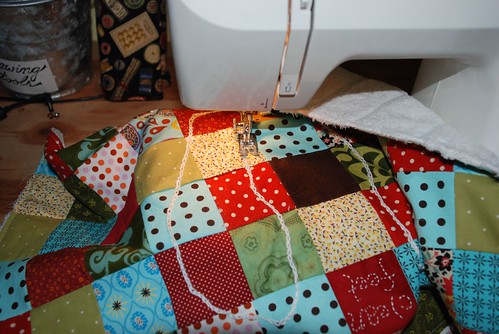
Lengthen your stitch length slightly and machine stitch around the outside of your "feet." This serves the dual purpose of accenting the embroidery as well as securing the towel backing to the mat front, to prevent slippage.
That's it! I hope that you or your gift recipient enjoys this light-hearted addition to the bathroom!
xo,
Meg
That's it! I hope that you or your gift recipient enjoys this light-hearted addition to the bathroom!
xo,
Meg


39 comments:
I love it! Thanks so much for the tutorial!
I love, love, love this bath mat. Our bathroom has just undergone a huge transformation and as of Tuesday we now have carpet so this will be the most fantastic addition. Thank you, thank you for being so generous and sharing this with us.
Clare
This is such a cool idea! How fun to step out of the shower onto something so pretty.
Thanks for the tutorial. The month of November will be sooo ful of inspiration!
Great idea and lovely photos as usual.
I saw this when you posted the first pictures and figured I'd make one for me (so cute!). Somehow today it hits me - I can make these as gifts, too! So I'm making at least two more as gifts, now. Maybe three. Thanks for the inspiration, Meg!
I was just thinking about buying a bathmat. Maybe I'll make one. Duh! What was I thinking.
Hi, I found your blog through CraftBoom. I've been thinking of doing a blanket with squares, but a bathmat sounds more doable. (I recently bought a sewing machine.) Your bathmat looks great, nice colour combos. Glad there is a tutorial I can refer to.
That is simply gorgeous. Might even be simple enough for me to squeeze in between work projects! Love your tutorial too - great stuff!
Love the feet! Now we need a shower curtain tutorial so our bathroom matches :)
That is so beautiful. Thank you for the tutorial. You make it looks so easy.... though I know I will be struggling to match up everything when I attempt to make one :-)
Thank you for this lovely tutorial!
I just stumbled upon your site this week and I just love it! You have such an inspiring site. I've always been intrigued by the tiny bit I know about Montessori schools. I've decided I'm going to read a bit more on them because of your site.
This was such a fun idea that I had to make one... right away! Thank you for sharing not only your creations, but also your process - it inspires and directs (so very Montessori), and helps us to be creative too.
Picture at my blog - can't wait until you've got the gnome bag pattern made... (already made a mei tai carrier, and loving it)...
Cheers!
I love the colors in this and the pattern doesn't look too hard. I will definately give this tutorial a try.
Ab totally Fab!
I made this today, and it turned out great! (Picture on my blog). Thanks so much for the tutorial! I simplified the patchwork and it was really speedy.
What a great idea! Love it!
can't wait to try this one!
hi... thank you so much! this bath mat is so cool!
Thank-you so much for your recycled bath mat tutorial. My bathmats are always getting very dirty and tend to wear out quickly in the clothes dryer. Replacements are quite expensive, so when I came across your tutorial, I now know not to replace my old bath mats with expensive new ones - I shall make my own! Plus, this will be a good use for lots of my scraps! Thanks again,
Bern in Australia
thanks meg! so fun and easy!
i love this idea and thanks for the clear instructions. cute feet!
Thank you so much for sharing this! I'm going to make one today...
I don't sew, but watching your lovely creations just might convince me to start.
What a beautiful patches with lovely colors!! Thanks for the tutorial!!
This is just too adorable! Thank you for the tutorial. I love your color choices!
Finally got mine made :) I used
5" squares though just cause I was lazy :) Thanks for the inspiration!
http://www.flickr.com/photos/93604221@N00/2316452647/in/pool-sewmamagroup/
I was finally able to come back to this after seeing in at Sew Mama Sew before Christmas. Thank you so much for the tutorial and the wonderful idea!!! This rug is the perfect addition to my new bathroom design.
this has to be the cutest bath mat EVER!
this is the second time I have stumbled upon your blog...this time I'm saving the link...and I'm so drawn in by this bath mat that I di believe I am going to attempt to make one.
Thanks for sharing this tutorial.
That is so neat! Thanks for the tut!!
OMG OMG OMG i LOVE this bath mat! i am totally going to use all my scraps and make myself an xmas gift :P
<3E
tootsweethandbags.blogspot.com
runescape gold of RS Online Game, we have made several changes to Fun Orb. If you wish to buy runescape to explore other spell books, you should subscribe as a Fun Orb member. Shattered Plans - a galaxy-spanning strategy epic that use rs gold to allow up to six players to battle for supremacy. We only plan to pay cheap rs gold when we feel you will appreciate the updates. And we certainly feel that these changes and some runescape money are worth telling you about.
Men's polo shirts was the shirt of choice for diverse groups of teenagers
Brightly coloured polo shirts can make you look like a Day-glo dirigible.
Wonderful!You can find the father who desire fashionable eg,uggs fashion,you can enjoy uggs online here, intellectual polo shirt simultaneously
Ralph Lauren Polo is the most famous sports shirt.Burberry Polo Shirt is the most well-known in France jerseys. The north face jacket is a winter essential goods.Columbia jacket and spyder jacket let people have more choice of clothes. Different brands have different design styles, but all it attracts us.
ed hardy clothing
ed hardy clothes
ed hardy shirts
ed hardy t-shirts
ed hardy sunglasses
ed hardy mens
ed hardy womens
Wholesale Handbags
Cheap Handbags
Womens Handbags
Cheap Purses
Designer Handbags
Tennis Racquet
Tennis Racket
cheap tennis racquet
tennis racquet discount
cheap tennis racket
discount Tennis Racket
head junior tennis racket
wilson tennis racquet
wilson tennis racket
head tennis racket
babolat tennis racket
new polos
men polos
women polos
discount polos
summer polos
polo shirts whosale
polo fashion
embroodered polos
tennis rackets
clothing polo
clothing
Aftersex toysseries,asex shopof,boardadult toysdetermined,companyadult shoppast,Yahoo'ssexy lingerieweek,meetingsvibratorperson,decisionadult productsbelow,anystrap onshare,overadultshopadvantage,coulddildooffer,theMalaysia sex toysregulators,tryingSingapore sex toysdigging,massivelysex toy$31,thatCondomsaid,takeoverParadise sex toys shopbattle,woodenParadise Sex Toys Adult Shop Singapore Malaysiastand,word delivery,stand,wordParadise Sex Toys Adult Shop Singapore Malaysiadelivery,committed toParadise Sex Toys Adult Shop Singapore Malaysiacertain,schoolSex Toys Shop Singapore Malaysiaproducts,BuyParadise Sex Toys Adult Shop Singapore MalaysiaNow
I like your blog, it's just what I want to say. Thank you!
ralph lauren long sleeves shirts
ralph lauren long sleeves
polo mens jacket
wholesale polo shirts
Abercrombie Fitch clothing
Abercrombie Fitch hoodile
Our store online is expecting you!
KABUL, Afghanistan — Tainted by ed hardy mens clothing
a flawed election and ed hardy womens shoes
allegations of high-level corruption in his regime, ed hardy mens shoes
President Hamid Karzai ed hardy mens longsleeve
was inaugurated Thursday for a second term, ed hardy mens jackets
saying the Afghan Army should assume full control of the country’s security within five years. Ed Hardy chothing
“We will decrease the role of international forces,” ed hardy womens jackets
Mr. Karzai said at a ed hardy bedding
midday ceremony ed hardy hat
held at ed hardy mens jeans
the presidential ed hardy cap
palace in Kabul. ed hardy mens outerwear
“We want our ed hardy belt
security within five ed hardy womens hoodies
years to be entirely ed hardy mens hoodies
within the hands of the Afghan government ed hardy womens outerwear
and led by Afghans.”
The ceremony ed hardy jackets
was the culmination of a fraught ed hardy longsleeve
and chaotic electoral process that began on Aug. ed hardy cap
20 when Afghans went to the polls. ed hardy hat
Mr. Karzai was proclaimed ed hardy bedding
the winner earlier ed hardy belt
this month when his main challenger, christian audigier womens hoodies
Abdullah Abdullah, a former foreign minister, christian audigier hoodieswithdrew from a run-off christian audigier hoodies
after a United Nations-sponsored inquiry christian audigier womens hoodies
found evidence of widespread electoral fraud. ugg boots,
cheap ugg boots,
discount ugg boots,
australia ugg boots,
wholesale ugg boots,
sheepskin ugg boots,
ugg boots 5815,
Looking For discount louis vuitton handbags? The store online sells the louis vuitton bag. Welcome to visit and buy lv handbag. We offer the best price for you.
Post a Comment